Ugly Busters
The ugly phase is something that every aquarist goes through, and if they don’t, they will come to know the common causes of the ugly phase because they are some of the more common and aggressive aquarium plagues. While everyone is going to deal with these pests on one way or another at one point in the life of their reef aquarium, there are a few ways to assuage the pain of it and avoid a disaster that might discourage you from continuing towards your goal of a mature reef aquarium. If you haven’t read our previous article on the basics of the ugly phase, give it a look.
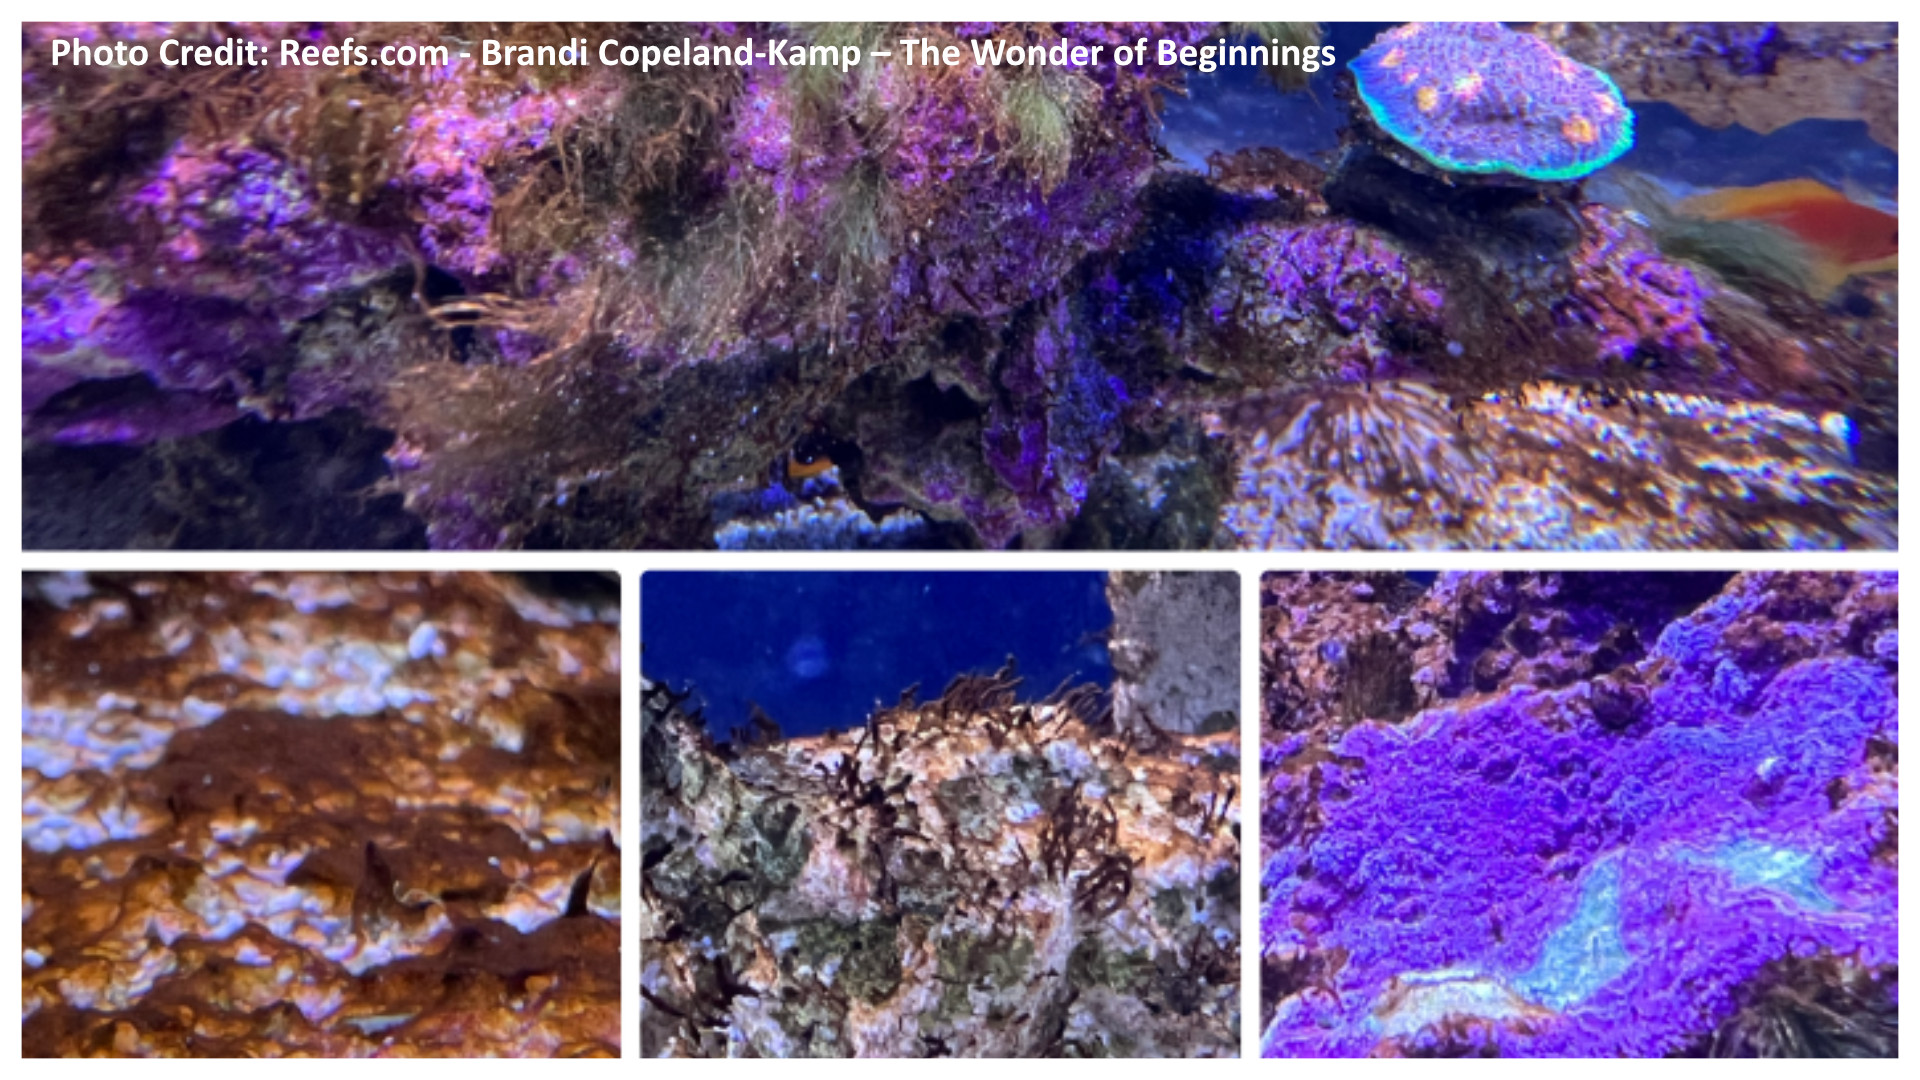
How you originally scape your aquarium will play a big role in the ugly phase. The reef is not a sterile place, with thousands if not millions of different algae, bacteria, invertebrates and more fighting for every inch of space they can claim on the reef. Having a healthy, established reef lessens the chance of outbreaks because something is already occupying and frequently defending its territory in the aquarium. How do you achieve this when starting a new aquarium? Try either getting rock from an established system or sump or start the process of curing rock when you first know that you are going to setup a tank. A large tub or brute trash can work well, simply fill it with saltwater, heat it to reef temperatures, add a powerhead for some flow and add a source of ammonia to start feeding beneficial bacteria. You can use water change water or some filter media like a filter sock to also get a kick start if you can find someone who will give you their dirty water or filter media! This will incorporate some life and bacteria from a healthy established system and the longer the rock sits, the more life that will hopefully show up on it. In the end there is no substitute for cultured live rock from the ocean or rock that has been established in a system – so if you can add something like that even if it's only one piece, it will help the rest of the rock get colonized and somewhat protected from the ugly phase. Plus, once you’ve gone through the process of feeding the rock with ammonia to kick start the nitrogen cycle you won't have to cycle the aquarium once it’s setup.
Photoperiod is the duration of which light hits the aquarium. This includes natural light, which can be beneficial for corals and other life in the aquarium but needs to be monitored to ensure that it isn’t too much or the cause of problems. Now that we know more about the Redfield Ratio (the fact that nitrogen is found at about a 16:1 ratio in nature and in life) we are less inclined to think that alga issues in the aquarium are caused by too many nutrients, and usually more along the lines of unbalanced nutrients. When you pair this with too much light, or too long of a photoperiod, the results can be disastrous. Start with shorter photoperiods – and if you can control your light like with many modern LED fixtures, dial down the intensity to start with. An eight-hour photoperiod is a good place to start and you can observe your corals and their needs. After this, you can slowly decrease it, (though less than six hours is likely not going to give your tank what it needs if you're looking for coral or algal growth), or you can slowly increase the photoperiod up to 12 hours but watch the aquarium and be ready to dial it back if you start noticing algae overtaking your cleanup crew.
Setting up the program for LEDs can be intimidating. Great resources are to reach out online or within a local reefing community, or your local fish store to ask how they are running the same light you have. Keep in mind that different corals have different needs and that the strength of light will also be effected by how much its being asked to light (how big is the aquarium) and what you are trying to achieve (do you want an SPS dominated aquarium, or mainly zoanthids?) in the end, experience with your particular light in similar situations is the easiest way to go. If you want to be able to fine tune this – try to get a PAR meter (which can measure useful light at depth). They can be expensive, but many local fish stores or clubs have a PAR meter available that you can rent or use with a membership fee. You will want to aim for 150-300 PAR for most corals, and having a range of PAR throughout a tank will allow you to grow different corals with different lighting needs. Higher kelvin settings (“bluer” light) on your LEDs will also assist in dissuading algae from growing, so start blue and as the tank and corals mature you can gradually add more and more white light until you reach a color that is appealing for you and healthy for your corals. In conclusion, favor lower values and shorter photoperiods over longer more intense ones and then slowly and gradually ramp up as your tank matures.
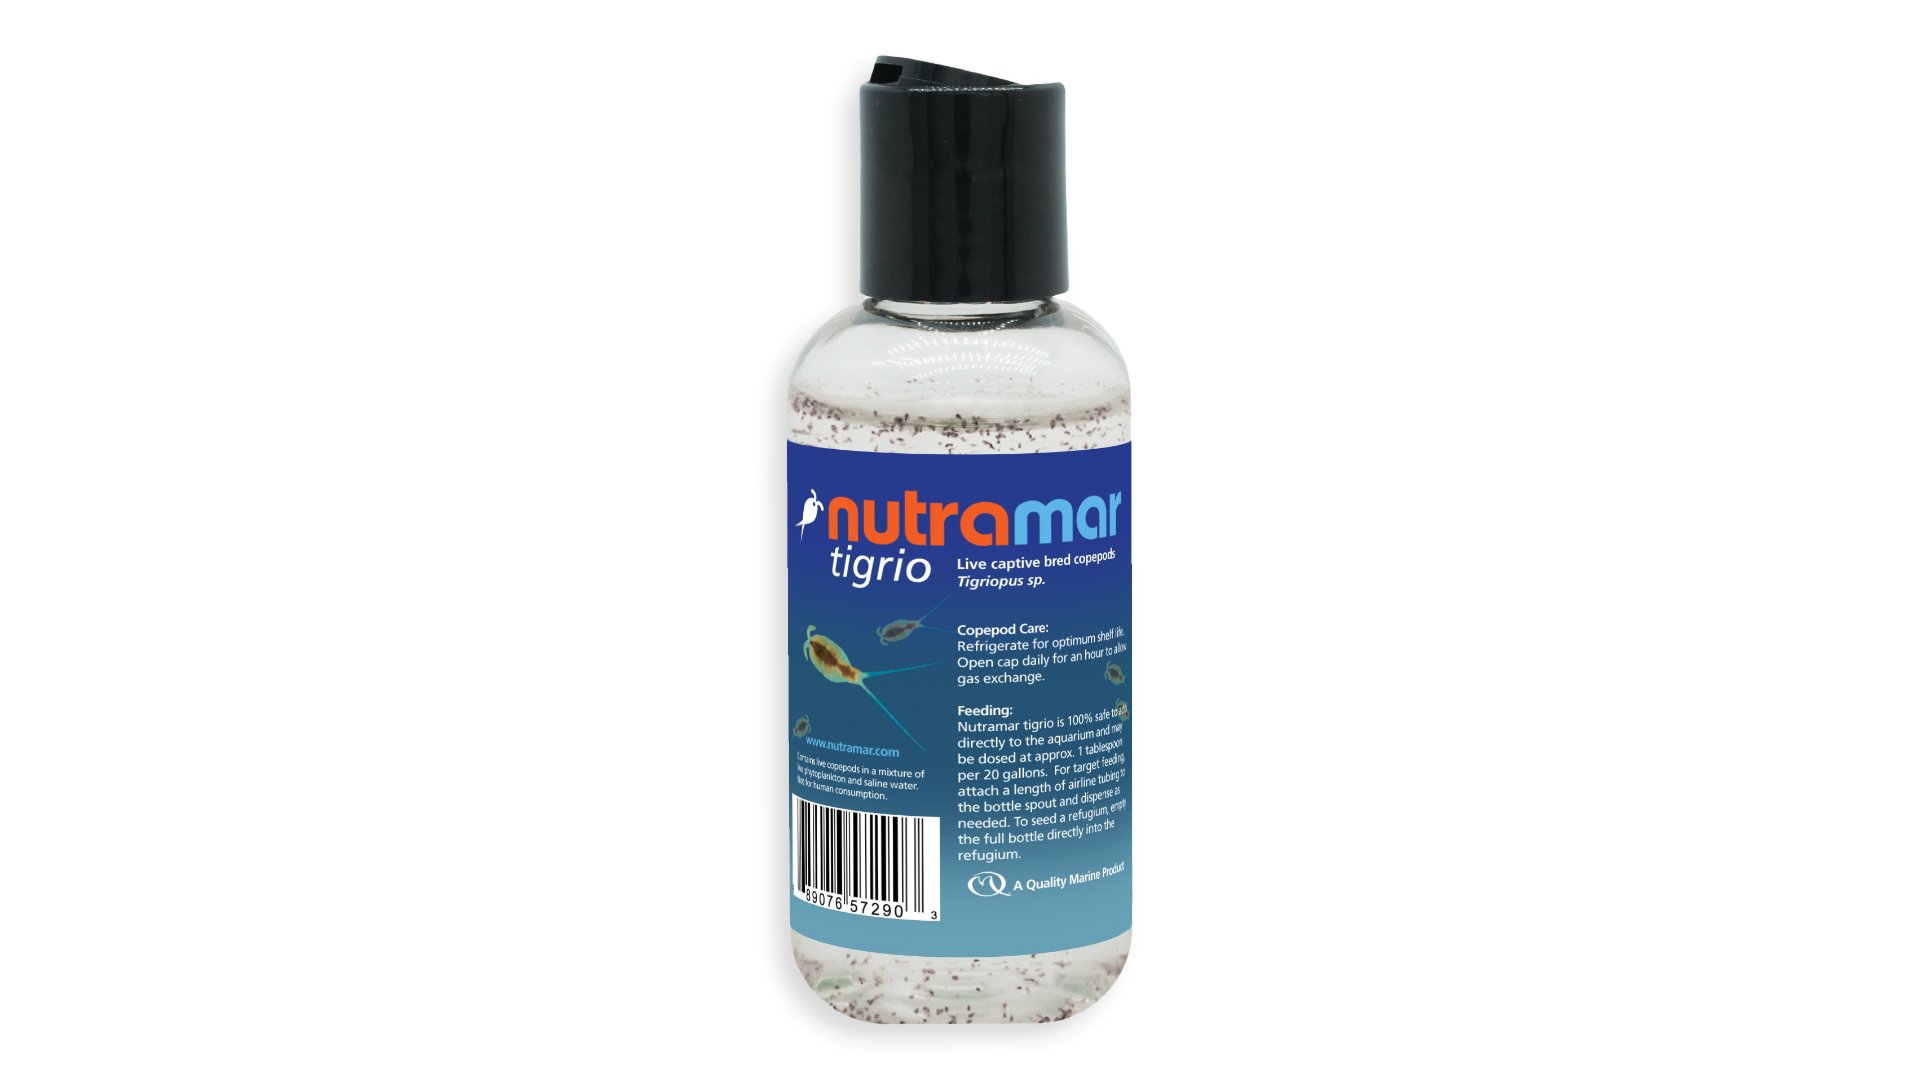
Cleanup crews or the “CUC” as you will sometimes see it referenced online are the collection of animals that help to break down waste and consume nuisance algae within the aquarium. Many people's algae problem wouldn’t be a problem if they simply had an appropriately sized cleanup crew. How many snails, crabs and more you need will be determined by how big your aquarium is, how much rockwork you have, whether you have sand, and how heavily you light and feed the aquarium. You can always add more, and we have a great article on what each member of the cleanup crew does, and how to stock them appropriately. You will need snails for both algae and detritus (decomposing organics like food) and a mixture of different things is best. Biological control also includes the use of fish in larger systems such as blennies, tangs and rabbitfishes that will graze on algae all day and help keep it in check. Copepods can be added as a great food source for fish and corals and they will also graze on some alga including the dreaded dinoflagellates. As with any animal, observation is key and when you start noticing them either running out of food or losing weight you will either need to rehome them or find a way to supplement their diet with alga potentially grown in your sump, dried algae products, or alga enriched foods intended for more herbivorous fish.
Starting off right, you need to have and use clean water to make your saltwater. Water changes are the ultimate reset in the reef aquarium and should be performed to remove solid waste that gets trapped in sand beds and to reset values like salts from dosing pumps or buildup of minor trace elements that aren’t being used as fast as they are being added on purpose or on accident. If the water you are returning to the aquarium isn’t clean, you may just be adding fuel for algae to the aquarium. Using RODI or reverse osmosis deionized water with properly maintained filters is a great way to ensure that you are starting with pure, clean water. Some people with well water can have it tested to see if it is pure enough to use, but even then, they should consider a product that would bind heavy metals, ammonia or chlorine just to be sure. Over time as a reef matures the alga in the corals will require some phosphates and nitrates for photosynthesis and so some trace amount in water will be okay, or even required, especially in smaller aquariums or nano aquariums where the stocking is very light.
Lastly there are chemical treatments for a few of these issues once they have already gotten out of hand, which might be why you have found this article in the first place. Some of these include medias that will help remove the excess nutrients that have your tank out of balance. Usually this is phosphate, and there are a wide variety of medias to absorb it but the most commonly used one is probably GFO or granular ferric oxide. GFO needs to be run in a media reactor, so keep that in mind. Other issues such as the algae Bryopsis can be very difficult to eliminate but can be treated with a chemical dosed directly into the aquarium water called Fluconazole. This is sold for the purpose of treating aquariums online and in our experience won't even kill most macro alga. For issues like red slime or cyanobacteria there are chemical treatments that are used with a light out period and then a serious of large water changes to help get your nutrients back into balance.
Start off with good rock that’s been cured for as long as possible. Go easy with light, have a good cleanup crew, and use clean water and you should be well on your way to a thriving reef. But remember, in this hobby there is no substitute for time and patience and a truly remarkable reef aquarium takes both!